
Installation & Troubleshooting
Learn to register, buy, install, activate and troubleshoot your TravelSIMPro eSIM.
TRAVELSIMPRO CUSTOMER HELP CENTRE
Get connected, step by step
Start with your order, then follow the instructions for your phone. If you have a connection problem, use the checks below before contacting support.
1. Register or sign in
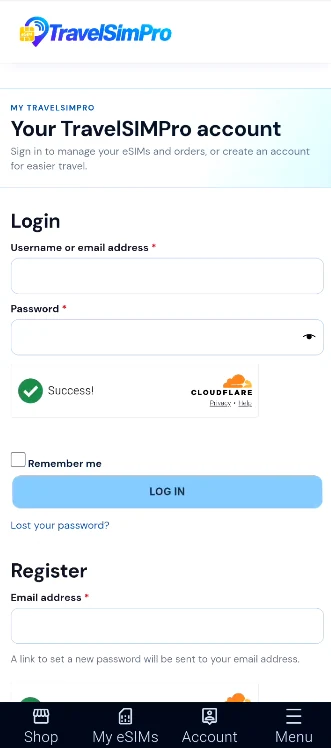
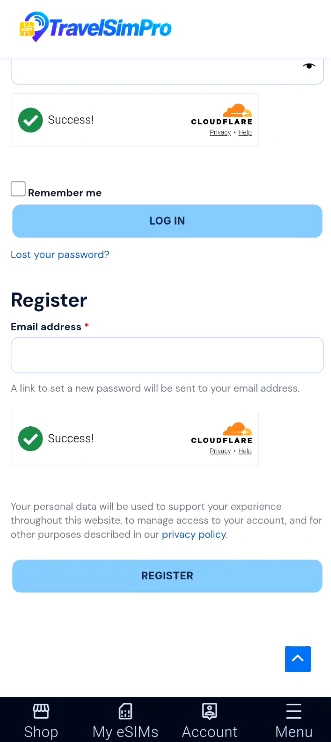
Tap Account on the bottom navigation. New customers can enter their email under Register, complete the security check and tap Register. A link to set a password is sent by email. Once your password is set, return to Account and log in.
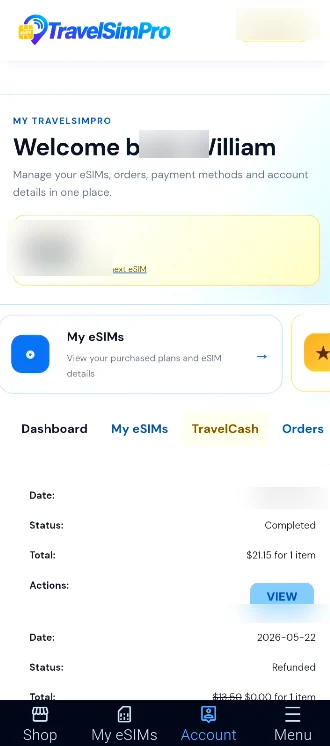
Already registered? Enter your email or username and password under Login. Your account lets you access My eSIMs and orders. Registration works the same on the website and both mobile apps.
2. Buy an eSIM
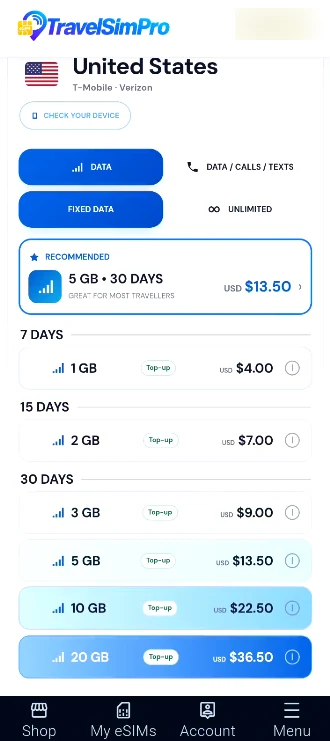
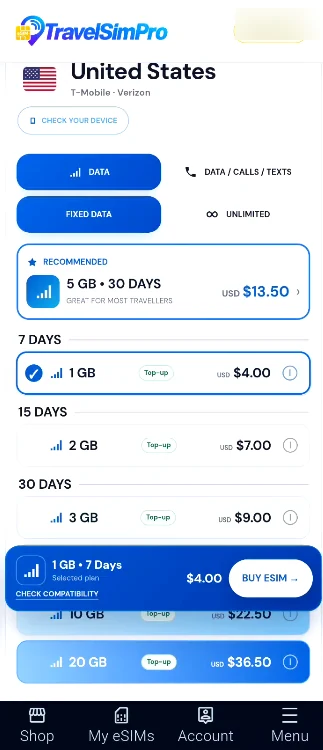
Open Shop, find your destination and compare available packages. Check device compatibility, coverage, data allowance, validity and activation rules for your chosen plan. Select the package, then tap Buy eSIM.
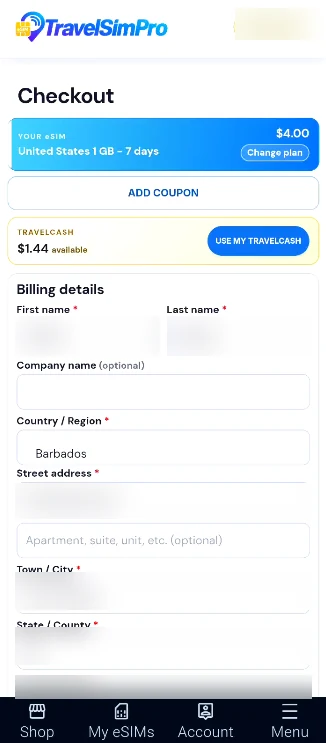
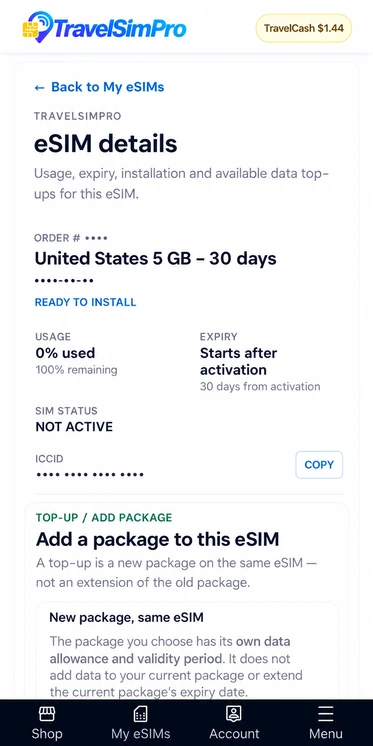
Review the selection at checkout, fill in required billing details and complete payment. Coupons and TravelCash may appear if eligible. After successful checkout, look for the confirmation and your installation email, and find the purchased eSIM under My eSIMs.
The screenshots show a United States example. Other destinations, prices and package options may vary. Personal data and identifiers have been obscured.
3. Install on your device
Use a stable Wi-Fi connection. Check your package activation policy before installing: some plans start validity on installation, others on first eligible connection.
Follow the detailed device instructions further down this page. If your package provides a manual activation code or direct installation option, use the instructions supplied with that package.
4. Must-do settings when you arrive
- Turn the installed TravelSIMPro eSIM line ON.
- Choose that eSIM as the phone’s Mobile Data / Cellular Data line.
- Turn Data Roaming ON for the travel eSIM when required by its instructions.
- Leave network selection on Automatic at first, and use the package-specific APN if one is supplied.
- Switch Wi-Fi off briefly and load a website to confirm the travel eSIM is providing data.
To avoid unexpected charges, verify which line is assigned to mobile data and whether your home SIM permits data switching.
5. Troubleshoot your connection
No Service / unable to register
Confirm the travel eSIM is on, then try Automatic network selection and Airplane Mode ON for 10–15 seconds before switching it OFF. If it still cannot register, check the roaming operator named in your exact package instructions. Not every visible local carrier is supported.
Signal appears but mobile internet does not work
Select the travel eSIM for mobile data, enable the roaming setting required by your plan, check its APN, and temporarily disable VPN or Private DNS for testing. Switch Wi-Fi off and try a website. Network registration alone does not mean a usable data session exists.
Internet is slow or the network keeps changing
Start with LTE/4G or an automatic network mode that includes LTE/4G. Avoid forcing 5G-only. If your exact package identifies multiple supported roaming operators, you can compare them through manual network selection. Actual speed depends on local coverage, signal strength and congestion.
Can I delete and reinstall the eSIM?
Do not delete the eSIM unless TravelSIMPro Support confirms that your specific profile can be reinstalled. Some QR codes are not reusable.
Illustrated eSIM setup — iPhone and Samsung
These screenshots show how to find important eSIM settings on iPhone and Samsung devices, including installing an eSIM, enabling the line, selecting mobile data and turning on data roaming. For connection troubleshooting, use the supported network and APN for your exact eSIM and destination. Menu labels and layouts may differ by device and software version.
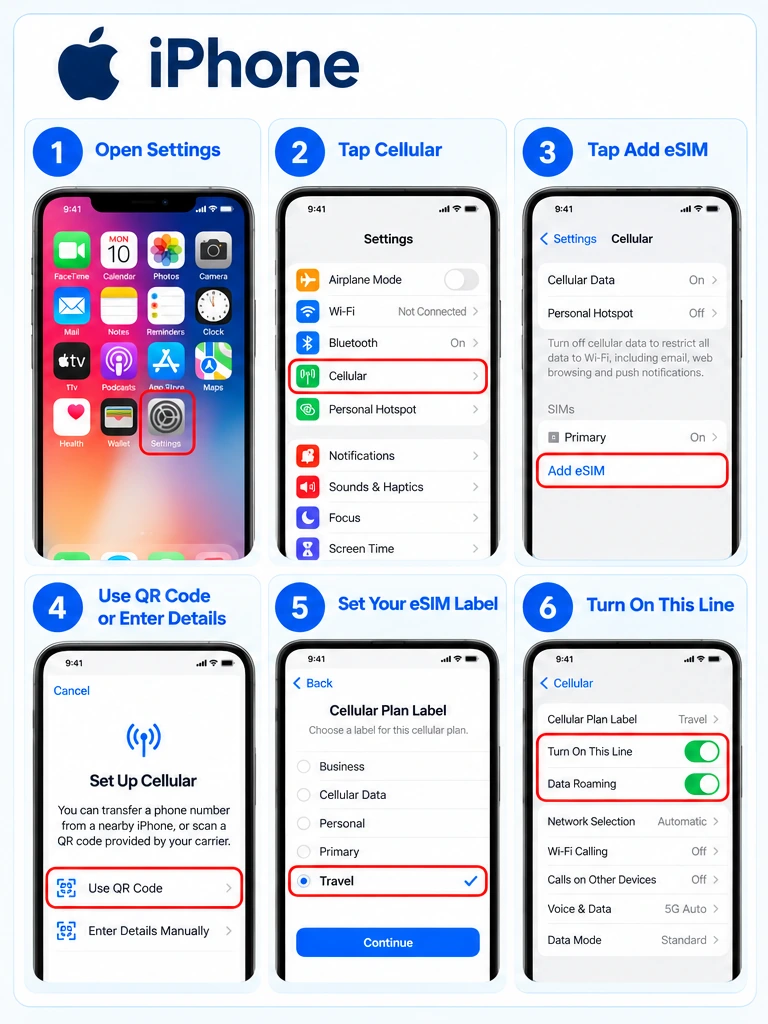
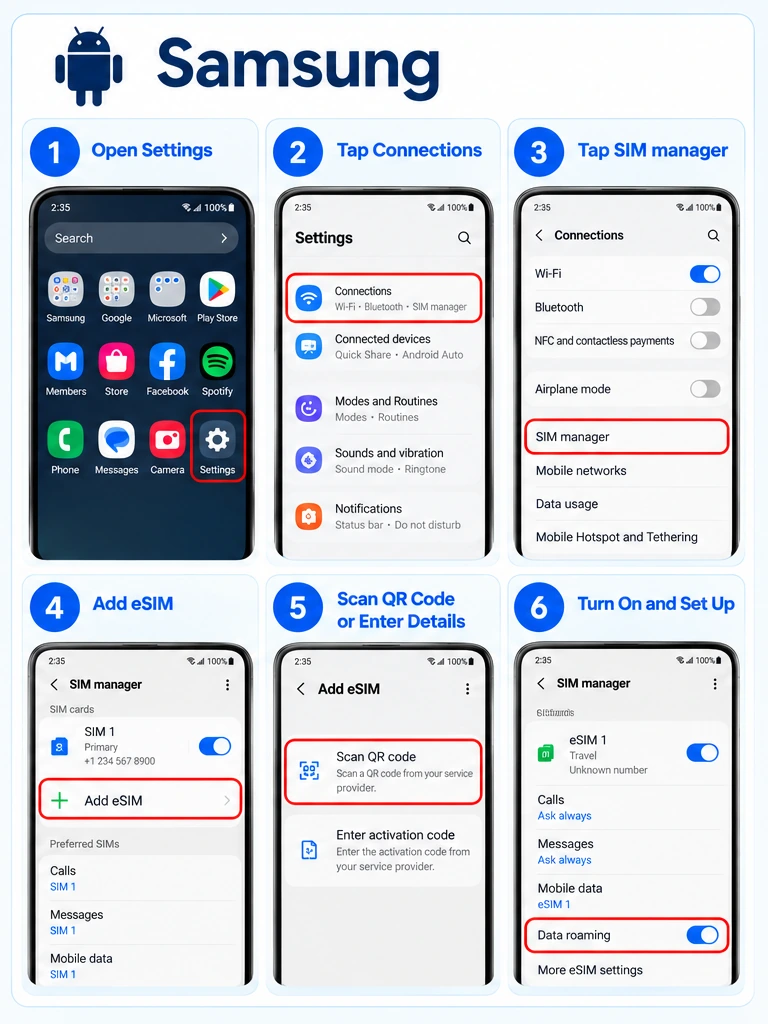
Screens are illustrative and may differ on newer iOS, Android or Samsung One UI versions. Do not delete an installed eSIM while troubleshooting.
Need plan-specific networks? Check the installation details for your purchased eSIM. We are developing a supported-carrier and network-technology lookup inside My eSIMs; until verified, this page will not guess your operator or APN.
Still stuck? Visit our FAQs or contact support. Include your destination, phone model, package and order reference, the network shown on screen, and the result of a Wi-Fi-off test. Share ICCID privately only.
Install Your TravelSIMPro eSIM
After purchasing an eSIM from TravelSIMPro, you will receive an email with your eSIM QR code and plan-specific installation information. Follow the instructions supplied with your eSIM because some setup details can vary by plan.
Tip: check the activation policy before installing
It is usually convenient to install your eSIM before departure while you have a reliable internet connection. However, first check the activation or validity policy supplied with your plan. Many plans begin their validity when the eSIM first connects to a supported network at your destination, while some plans can begin when the eSIM is installed.
Before Installing Your eSIM
- Confirm that your device supports eSIM.
- Make sure your phone is carrier unlocked.
- Use a stable internet connection, preferably Wi-Fi.
- Keep your order email and QR code available.
- Read the plan-specific activation/validity policy before installation.
Install eSIM on iPhone
- Open Settings.
- Tap Cellular or Mobile Data.
- Tap Add eSIM.
- Select Use QR Code.
- Scan the QR code from your TravelSIMPro order email.
- Follow the on-screen prompts to complete installation.
When you are ready to use the plan, turn on the travel eSIM and select it as your mobile-data line. Enable data roaming only when your plan instructions require it. If your eSIM instructions include an APN or other network setting, enter it exactly as provided.
Install eSIM on Android
Android menu names vary by manufacturer and software version. The typical flow is:
- Open Settings.
- Tap Connections or Network & Internet.
- Open SIM Manager, SIMs or Mobile Network.
- Select Add eSIM.
- Scan the QR code from your TravelSIMPro order email.
- Follow the on-screen prompts to complete installation.
At your destination, turn on the travel eSIM, select it for mobile data and follow any roaming, APN or network instructions supplied with your plan.
Important Tips
- Do not delete the eSIM profile after it has been installed unless support specifically tells you to do so.
- Keep the original order email and QR code for reference.
- Do not assume every plan activates at the same time - check the activation/validity policy for your eSIM.
- If the plan includes special APN, network-selection or roaming instructions, use those plan-specific settings.
If You Did Not Receive Your eSIM Email
After checkout is completed, your eSIM is sent by email. If it does not arrive promptly, check your Spam or Junk folder and confirm that the email address used during checkout is correct.
If you still cannot find the email, contact us at support@travelsimpro.com and include your order number.
Need Help Installing Your eSIM?
If you have trouble installing or connecting your eSIM, Contact TravelSIMPro support or email support@travelsimpro.com.
You can also review Compatible Devices before installation or visit the FAQs for common setup questions.
